
Are you tired of dealing with harsh highlights in your portraits? They can be distracting and take away from the overall image. But fear not! In this tutorial, I will show you a quick and easy way to remove those harsh highlights in Photoshop without affecting the shadow detail.
Read more: Bright Ideas for a Greener Tomorrow: LED Lights Lead the Way
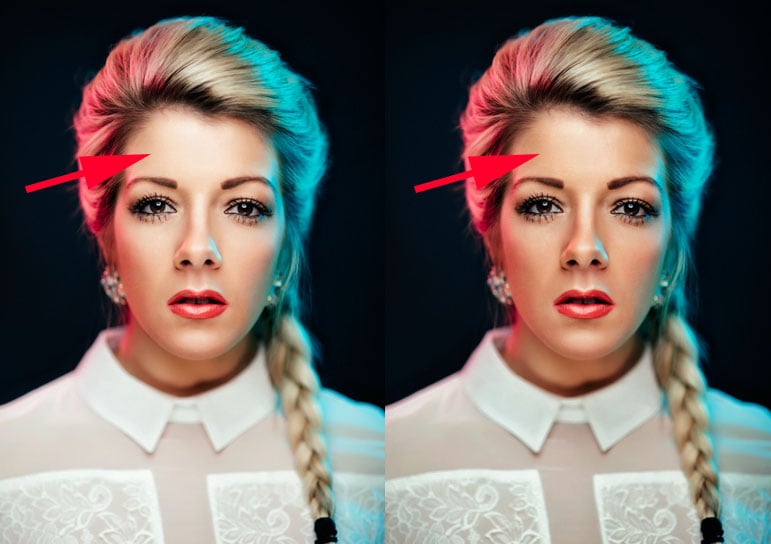
The Problem with Harsh Highlights
When our eyes see a bright spot in an image, they automatically focus on it. This can be a problem if the bright spot is not where we want the viewer's attention to be, especially in portraits. Sometimes, certain areas of the image may be so bright that they become a distraction. So how do we adjust the highlights without affecting the shadows?
The Quick and Easy Solution
Follow these step-by-step instructions to seamlessly manage harsh highlights in your portraits:
-
Open your image in Photoshop.
-
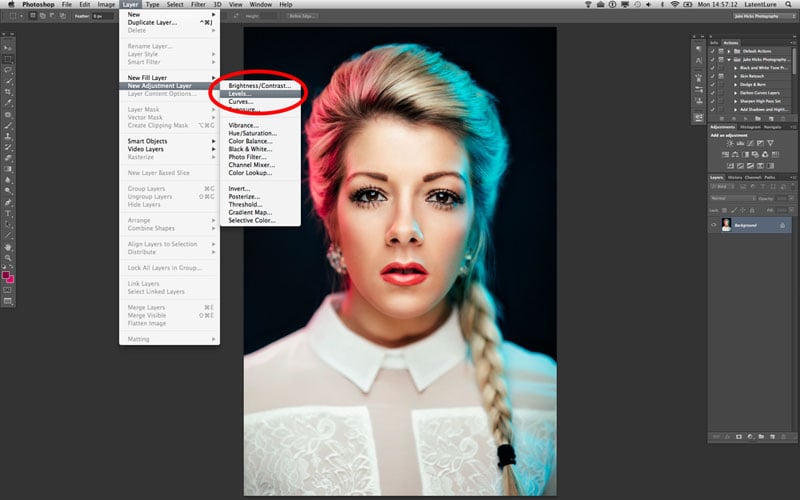
Create a new levels adjustment layer. Go to Layer -> New Adjustment Layer -> Levels...

-
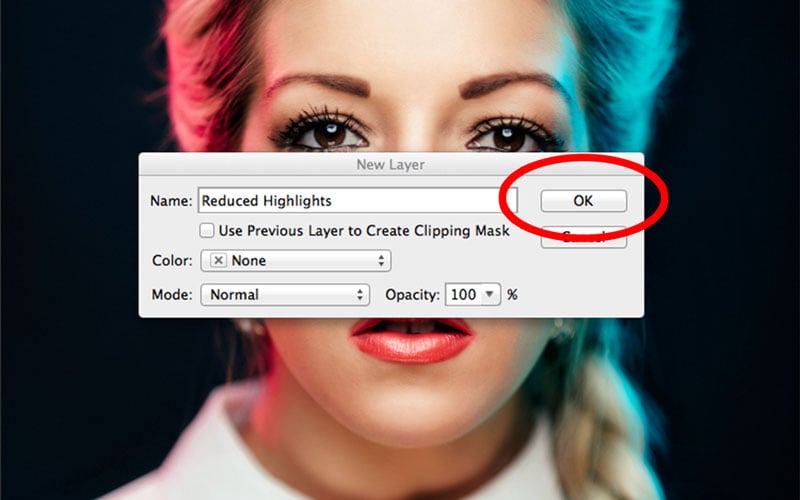
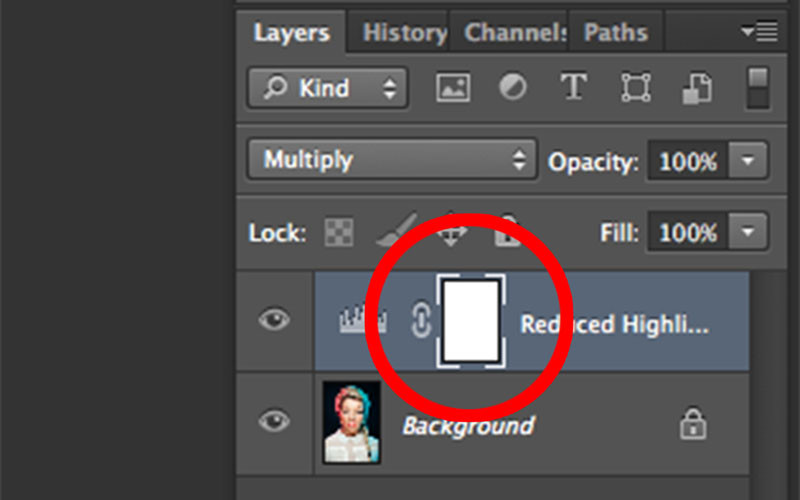
Rename the adjustment layer to 'Reduced Highlights'. Hit OK.

-
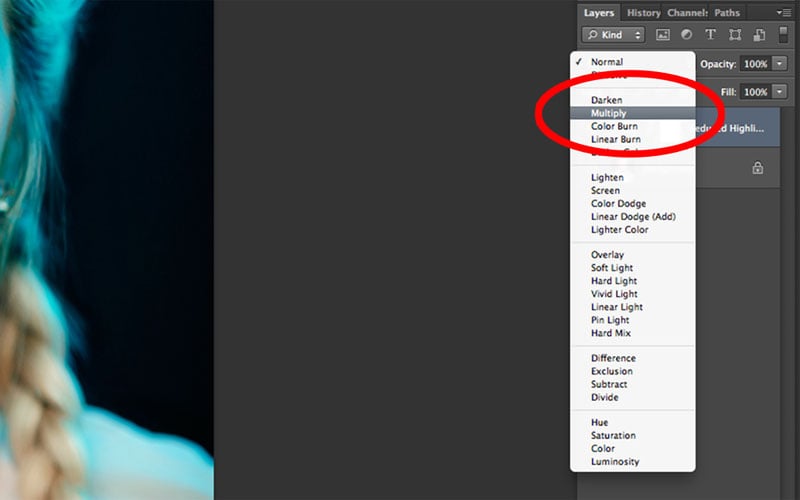
Change the blend mode of the adjustment layer to 'Multiply'.
-
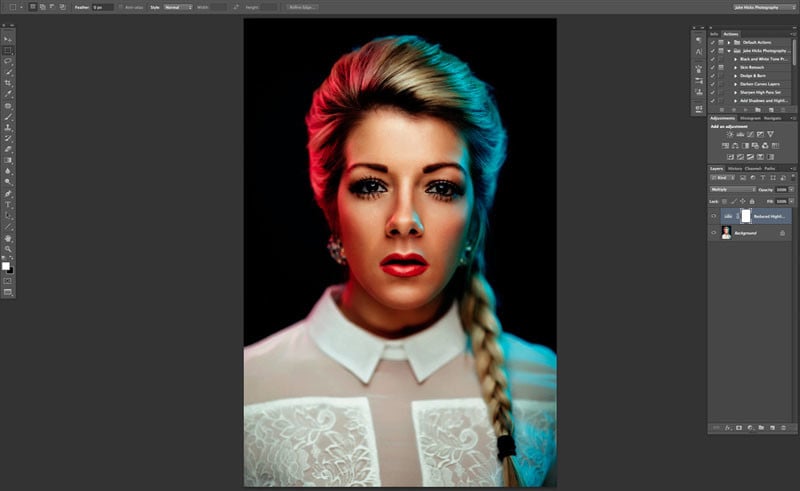
Your image will now look darker overall, including the highlights. We need to separate the darker highlights from the rest of the image.

-
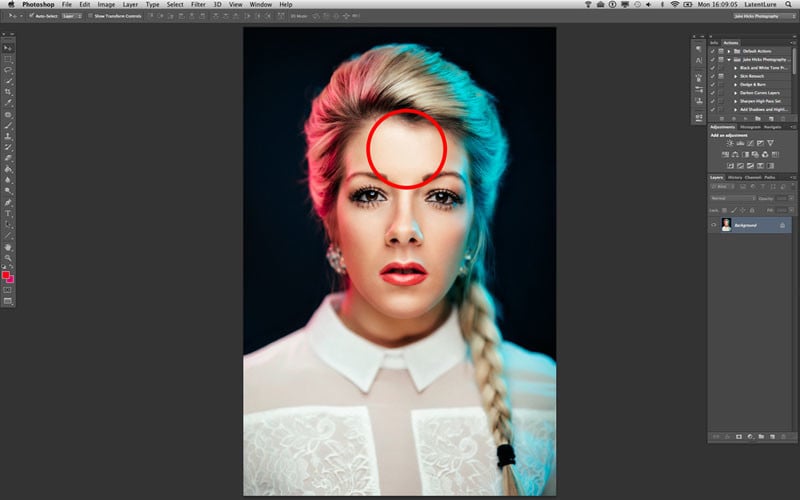
In the layers palette, select the mask of the 'Reduced Highlights' adjustment layer.
-
Go to Select -> Color Range. In the menu, select 'Highlights' from the drop-down menu under 'Select: Sampled Colors'. Hit OK.

-
Now the highlights should be even darker, but the rest of the image should remain unaffected. We need to fine-tune the effect.
-
To adjust the feathering of the mask, click on the adjustment layer's mask and go to Window -> Properties. Manipulate the 'Feather' option in the Properties panel. A feathering value of around 100px usually works well.
-
Additionally, you can adjust the opacity of the adjustment layer to control the intensity of the effect. Start with around 70% and adjust as needed.

-
That's it! You're done. It may seem like a lot of steps initially, but once you get the hang of it, this technique can be done in seconds.
So there you have it! A simple and effective way to remove harsh highlights in your portraits without affecting the shadows. Give it a try and let me know if it improves your retouching workflow. And if you have any ideas or questions, feel free to share them with me.
Read more: What Does A Smart Light Switch Do?
Frequently Asked Questions
Q: Can I use this technique for other types of images, not just portraits?
A: Absolutely! While this tutorial focuses on portraits, you can apply this technique to any image that has harsh highlights you want to soften.
Q: Is this technique only applicable to Photoshop CS6 and above?
A: No, this technique can be used in any version of Photoshop that supports adjustment layers and masks.
Q: Can I save this as an action for future use?
A: Yes, once you are familiar with the steps, you can create an action in Photoshop to automate the process and save time.
So go ahead and experiment with this technique to achieve beautifully balanced images without distracting harsh highlights. And if you want to learn more about my complete retouching workflow, check out my Post-Pro workshops for a comprehensive training experience. Happy retouching!
Read more: How Do Smart Light Switches Work?